Condition Stable Diffusion images with ControlNet
Background
This is another aspect of the Stable Diffusion AI art library, covered previously. With ControlNet, users can ‘condition’ the generation of an image with a spatial context such as a segmentation map or a scribble. That is, you can weight the model to produce images that are constrained to the form of another. We can turn a cartoon drawing into a realistic photo for example, or place another face in a portrait. We can still provide a prompt to guide the image generation process, just like normal. You can do this yourself using the Diffusers library. It exposes the StableDiffusionControlNetPipeline similar to other pipelines. Much of the code here is taken from this colab notebook.
Install
pip install -q diffusers==0.14.0 transformers xformers git+https://github.com/huggingface/accelerate.git
pip install -q opencv-contrib-python
pip install -q controlnet_aux
Code
First we create the pipe object. The controlnet argument which lets us provide a particular trained ControlNetModel instance while keeping the pre-trained diffusion model weights the same.
from diffusers import StableDiffusionControlNetPipeline, ControlNetModel
import torch

controlnet = ControlNetModel.from_pretrained("lllyasviel/sd-controlnet-canny", torch_dtype=torch.float16, safety_checker=None)
pipe = StableDiffusionControlNetPipeline.from_pretrained(
    "runwayml/stable-diffusion-v1-5", controlnet=controlnet, torch_dtype=torch.float16
)
from diffusers import UniPCMultistepScheduler

pipe.scheduler = UniPCMultistepScheduler.from_config(pipe.scheduler.config)
pipe.enable_model_cpu_offload()
pipe.enable_xformers_memory_efficient_attention()
pipe.safety_checker = lambda images, clip_input: (images, False)
This code then makes the conditioning image. We put the image through the canny pre-processor, which is like edge detection. The the controlnet_prompt function takes the canny_img and provides it to the pipeline.
from diffusers.utils import load_image

def conditioning(image):
    import cv2
    from PIL import Image

    image = np.array(image)

    low_threshold = 100
    high_threshold = 200

    image = cv2.Canny(image, low_threshold, high_threshold)
    image = image[:, :, None]
    image = np.concatenate([image, image, image], axis=2)
    canny_image = Image.fromarray(image)
    return canny_image

def controlnet_prompt(prompt, canny_img, n=1, style=None, path='.'):
    if style != None:
        prompt += ' by %s'%style

    for c in range(n):
        random_seed = np.random.randint(1000)
        generator = torch.Generator(device="cpu").manual_seed(random_seed)
        output = pipe(
            prompt,
            canny_img,
            negative_prompt="disfigured, monochrome, lowres, bad anatomy, worst quality, low quality" * len(prompt),
            generator=generator,
            num_inference_steps=20,
        )
        image = output.images[0]
        if not os.path.exists(path):
            os.makedirs(path)
        i=1
        imgfile = os.path.join(path,prompt[:90]+'_%s.png' %i)
        while os.path.exists(imgfile):
            i+=1
            imgfile = os.path.join(path,prompt[:90]+'_%s.png' %i)
        image.save(imgfile,'png')
    return image
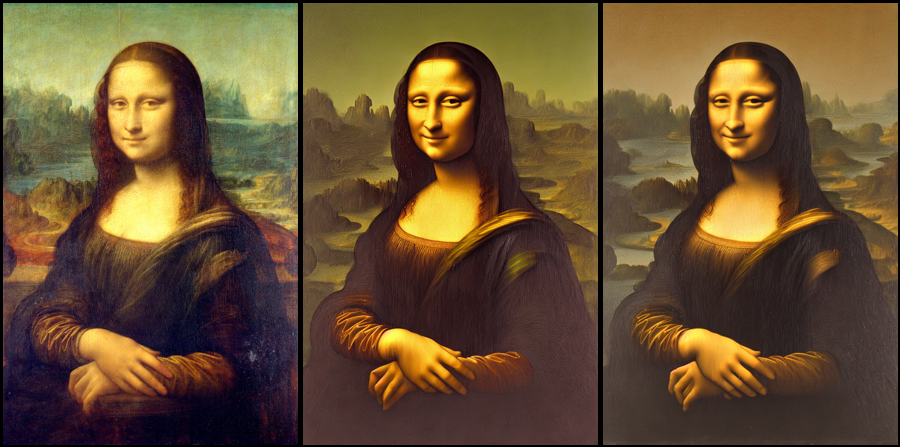
Mona Lisa smile
Let’s try use this to make the Mona Lisa smile. This can be done by using the original painting as the condition, with the face removed (May not be necesary). Then we use the prompt “mona lisa smiling, style of leonardo da vinci”. The results are compared to the original below. Not totally convincing but it shows the concept.
Superman actors
Here is the same idea with some actors as superman, using a picture of Superman with face erased.

This is just a tiny example. There are many other specific uses detailed elsewhere, such as in this much more complete guide. It details how to use ControlNet in AUTOMATIC1111, a popular and full-featured Stable Diffusion GUI.