pathogenie - A desktop application for microbial genome annotation
Background
Among the many tools for genome annotation most are command line tools or web-based interfaces to server side tools. Unfortunately there are a large number of people who find command line tools challenging to use. There are advantages to using a graphical interface such as flexibility and integration of visual components with analysis. Pathogenie is a desktop tool for microbial genome annotations. It is written in Python with the Qt toolkit (PySide2). It’s main function is to annotate genomes and allow user to explore the results via the output tables. There is also functionality for quick gene finding by blasting to known gene sets like antibiotic resistance genes. Required for input is one or more fasta nucleotide files containing all or part of an assembled genome. Such a file would typically be the output of a genome assembler. The program is not meant to work on eukaryotic genomes. This software is still under development and suggestions for improvements are welcome.
Interface
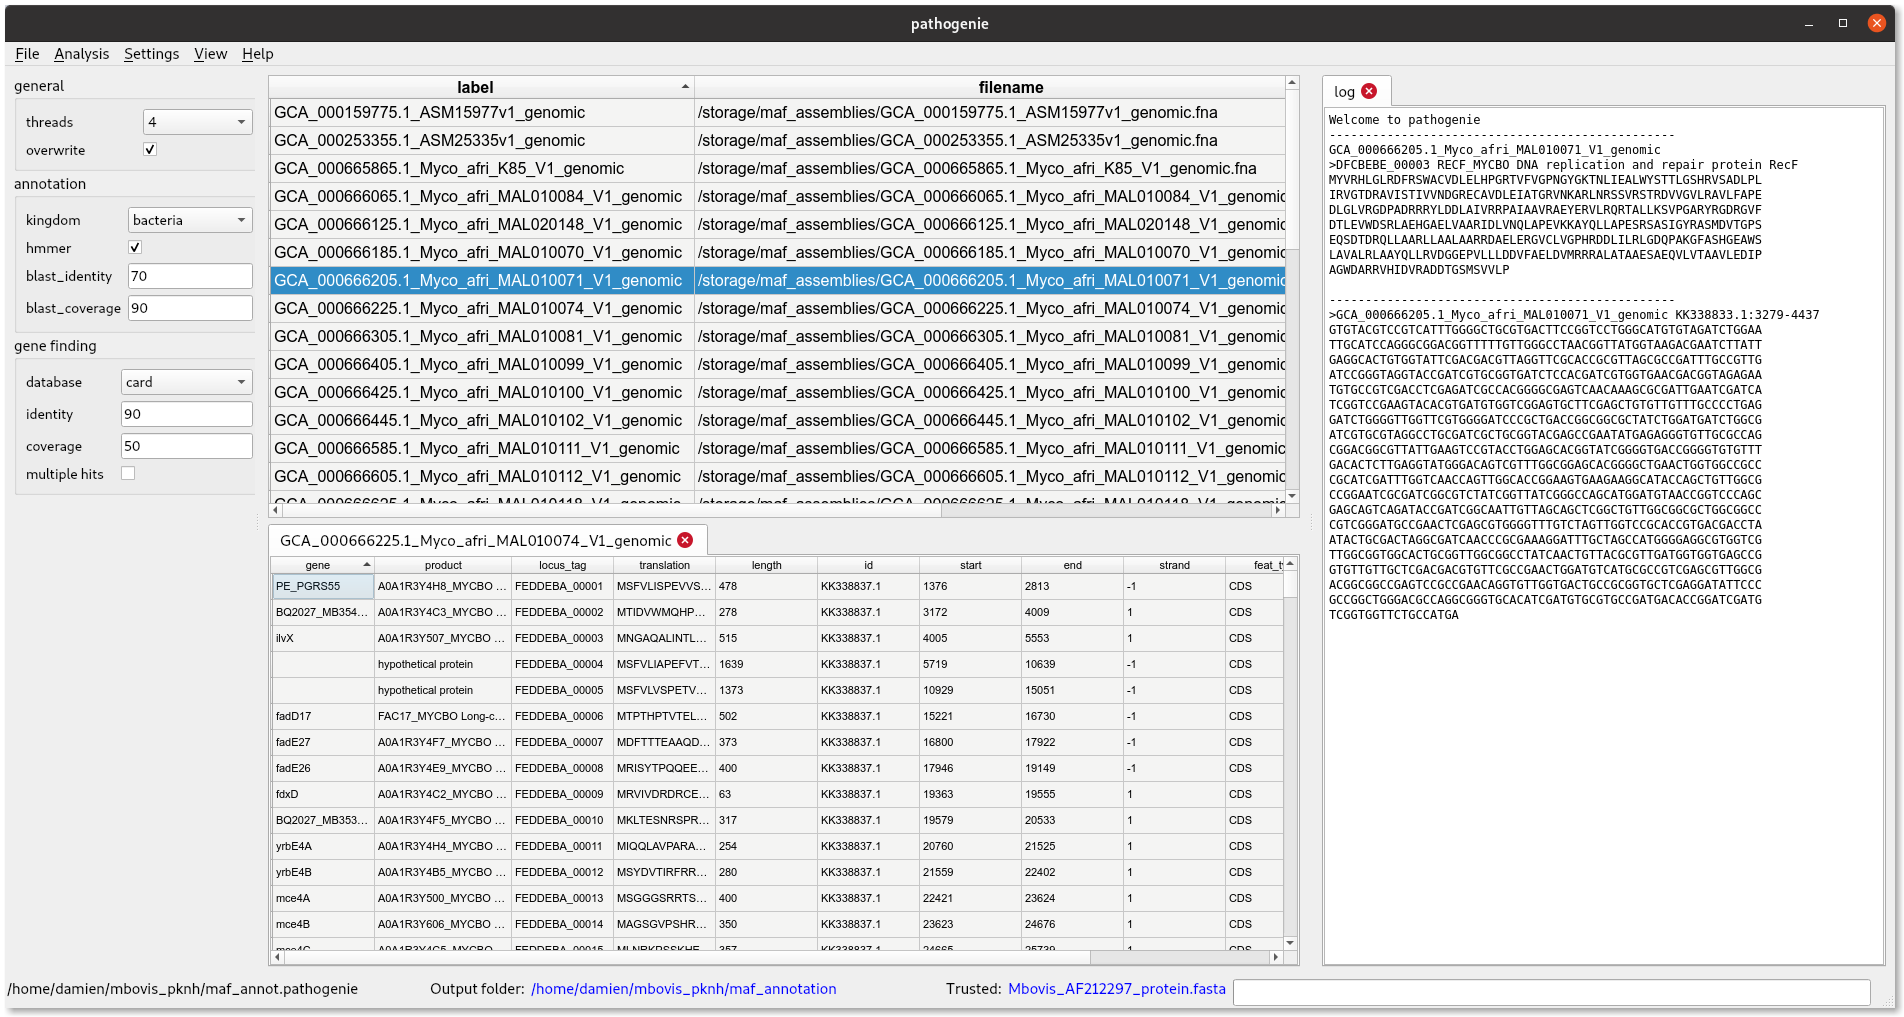
The interface consists of three main panels. One on top for loading input fasta files, at bottom an area for showing output tables like gene features. At left is a text log for other results like sequences and messages to be shown. Text can be copied from here.
Annotation
The annotation in pathogenie is mostly modelled on the Prokka method though it’s a somewhat simpler version with not all the same features. (Prokka is a microbial genome annotation tool written in Perl). Genes are first identified with prodigal and the open reading frames blasted in turn to amr genes and a set of non redundant UniProt proteins. The remaining unknowns are run through hmmer. tRNAs are identified with aragorn. A set of trusted proteins can be added for species specific use.
Running an annotation
- The program opens with an empty project. First set the output folder (Settings menu)
- Add some input fasta files (File->Add fasta files)
- Set some trusted proteins if required (Settings menu)
- Select number of threads to use (drop down menu in sidebar)
- Select the rows in the table to annotate
- Choose Analysis->Annotate Selected
This should take several minutes per sequence depending on your computer. When finished you will see a ‘genes’ column indicating how many genes were found and a genbank file location. If you want to return to this data later you can save the project.
Annotation results
The main output is a feature table of the annotated proteins which can be opened in the lower table. From this you may make one more row selections and view the region graphically as below:
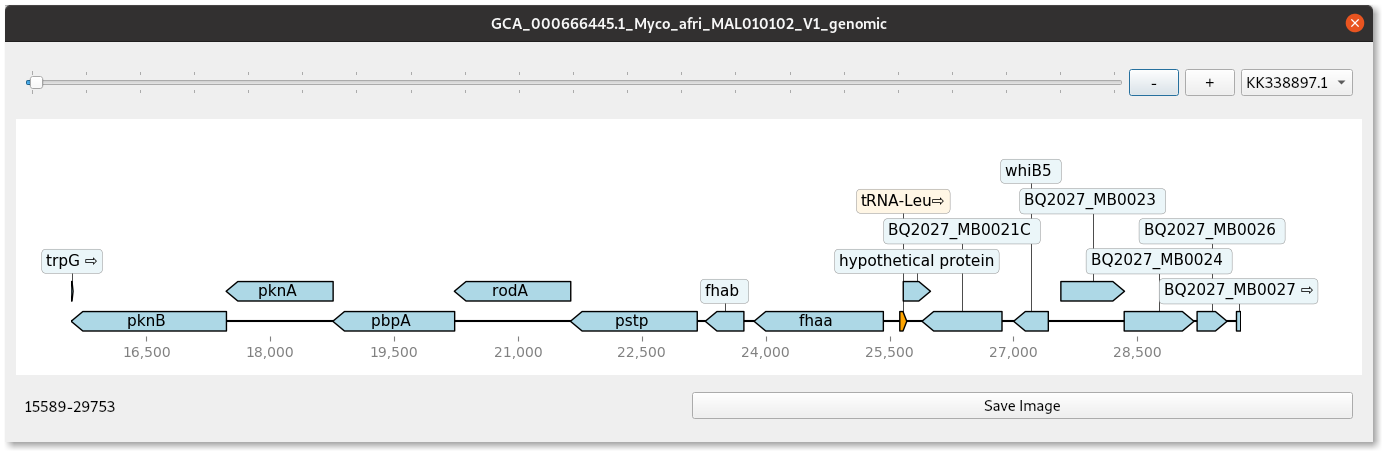
You can also view the protein or nucleotide sequence of the selected region. The find orthologs function will blast all annotated proteins in the project to view orthologs at a chosen level of identity. These features are shown in the animated example below. MOre functionality is still to be added.
Gene finding
This tool allows you to search your sequences for specific genes like antibiotic resistance genes using a local blast. It then returns a table of all the best matches. You can set a threshold level of identity and coverage for the search since you may be looking for very specific hits. It will also allow you to align the matching genes across all samples if present.
Using from inside python
import pathogenie
featdf,recs = pathogenie.app.run_annotation(filename, threads=10, kingdom='bacteria')
#save to genbank
pathogenie.tools.recs_to_genbank(recs, gbfile)
Installation
pip install -e git+https://github.com/dmnfarrell/pathogenie.git#egg=pathogenie
See the github page for more installation details.