Make protein models with Blender
Background
NOTE: An updated method for doing this with Molecular Nodes is detailed here.

Protein structures are solved using X-ray crystallography, NMR and cryo-EM methods. They are essential for understanding the function and interactions in the cell at the physical level. An obvious way to visualise them is in 3D graphical viewers such as PyMol. These are used to make 2D images for papers. These are human interpretable cartoon representations of the proteins (or other molecules) and a fair amount of artistic license is used to depict them. It makes sense therefore to explore novel ways of displaying these stylized images. This could aid in interepretation or simply look nice in a presentation. Blender is a free program capable of advanced 3D modelling, animation and rendering. It is used to create photo realistic images for many applications such as animated films or architecture. This article shows briefly how you can use Blender to render imaginative versions of your molecular structures.
The basic requirements are the programs PyMOL and Blender. You can install both freely on any major OS. It’s assumed you have some basic knowledge of both programs. If not you can do some basic tutorials. Though Blender has a somewhat steep learning curve. You also need a fast enough computer if manipulating and rendering some of these models. One with a decent graphics card is recommended if possible. If you’re not interested in the method used skip below to see some examples.
Import a PDB structure into Blender
This is a brief summary of the method used. A more detailed guide will require a video tutorial. It’s also possible to import pdb files directly into Blender but this seems fairly limited.
- Open the PDB file in PyMOL
- Display the structure as you want it to look in the final model i.e. as a cartoon or surface representation.
- If the structure is made of multiple chains you might want to split them up so they can be imported as separate objects. You can use the
split_chainscommand for this. Once you orient the structure, don’t move it around if you are saving multiple parts so that the models get exported in the same orientation. - With the model or chains you want visible, choose file->export image as->vrml 2. Save the file. This is a standard file format for representing 3D data.
- You then open Blender and choose file->import X3d Extensible 3D (.wrl)
- If the model is large it might take a minute.
- Once the file is loaded you can set up a scene with some lighting and a camera.
- Apply materials to the model(s) and then render the scene. This means creating the final image with all the realistic lighting, reflections and so on.
PyMOL tips
- you can use
split_chainsto split the protein into chains so you can export each one individually - use
set surface_quality, 1to improve the quality of the mesh exported from PyMOL. - use
set cartoon_side_chain_helper, onto only show side chains as sticks
Examples
These examples were chosen from the PDB Molecule of the Month site.
Photoactive Yellow Protein
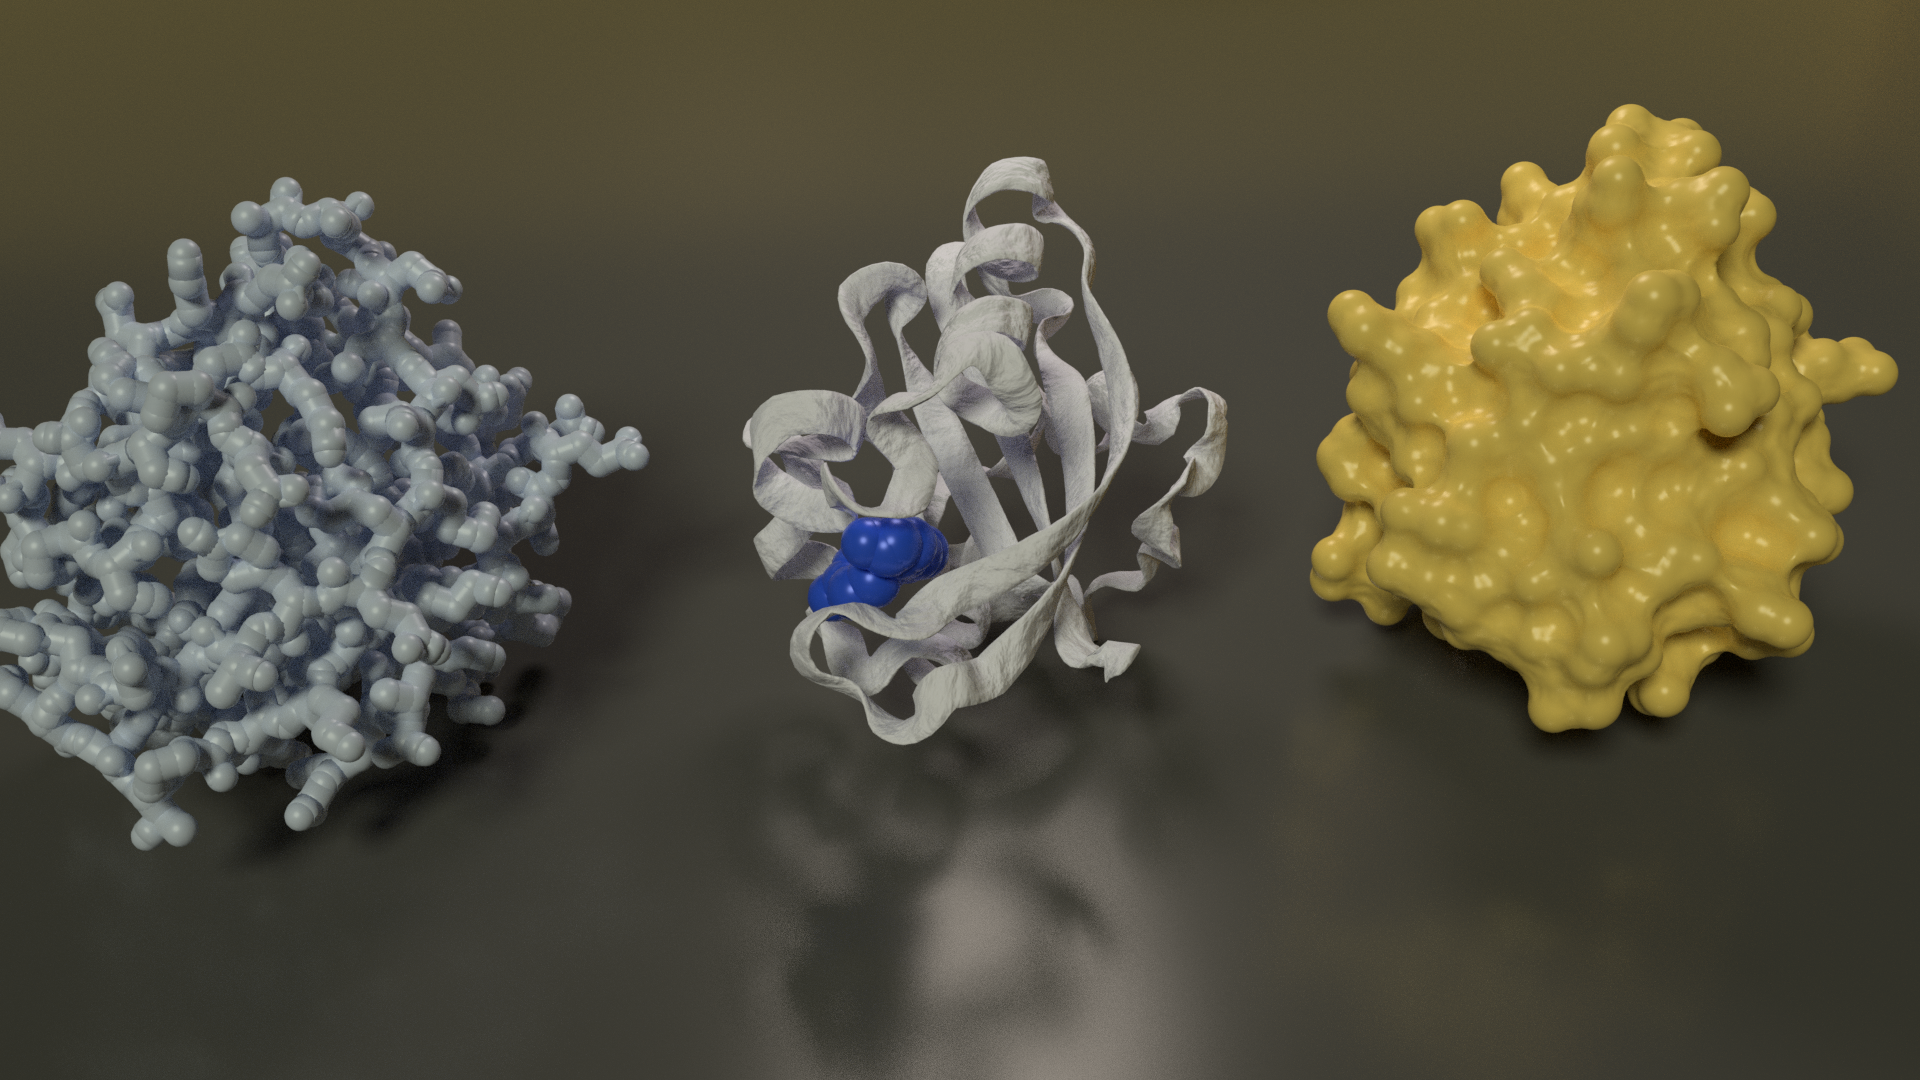
PYP is a small, soluble protein found in purple sulfur bacteria that senses blue light. It is a small globular protein and a good simple example. The image below shows the same protein rendered with three typical representations: sticks, cartoon and molecular surface. The blue molecule in the centre model is the ligand involved in sensing light.
MHC-peptide complex
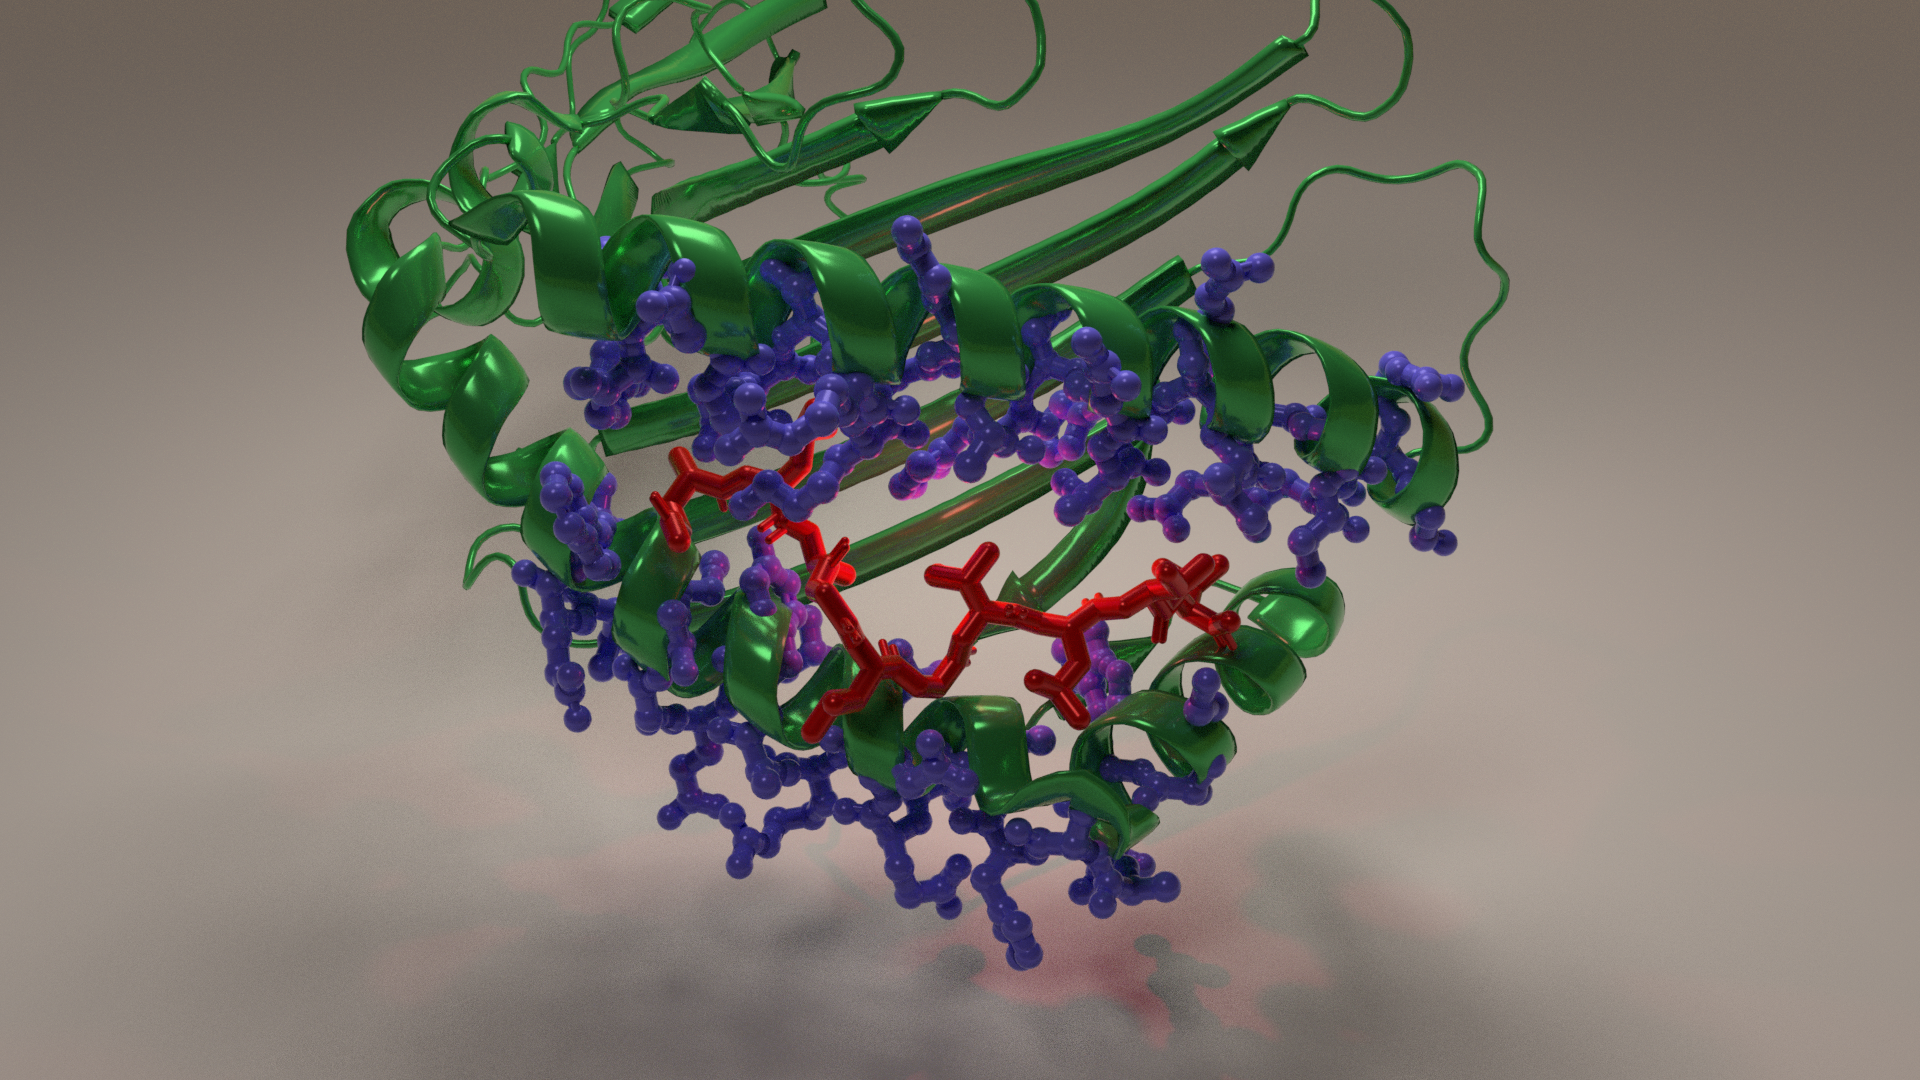
Major Histocompatibility Complex are glycoproteins whose principal function is to present peptide antigen to T cells to discriminate between self and non-self cells. This is done by binding the peptide in a cleft. MHC-I molecules, as shown below, consist of a1 and a2 helices lying on an antiparallel b sheet that form this groove. The fit of the peptide within the groove is very specific. Peptides bind through multiple van der Waals forces and hydrogen bonds with the anchor residues in the groove. The image below shows the MHC with peptide in the groove. The peptide is shown in red with the side chains as blue sticks. The inward pointing side chains interact with the peptide and give the MHC molecule its unique binding properties.
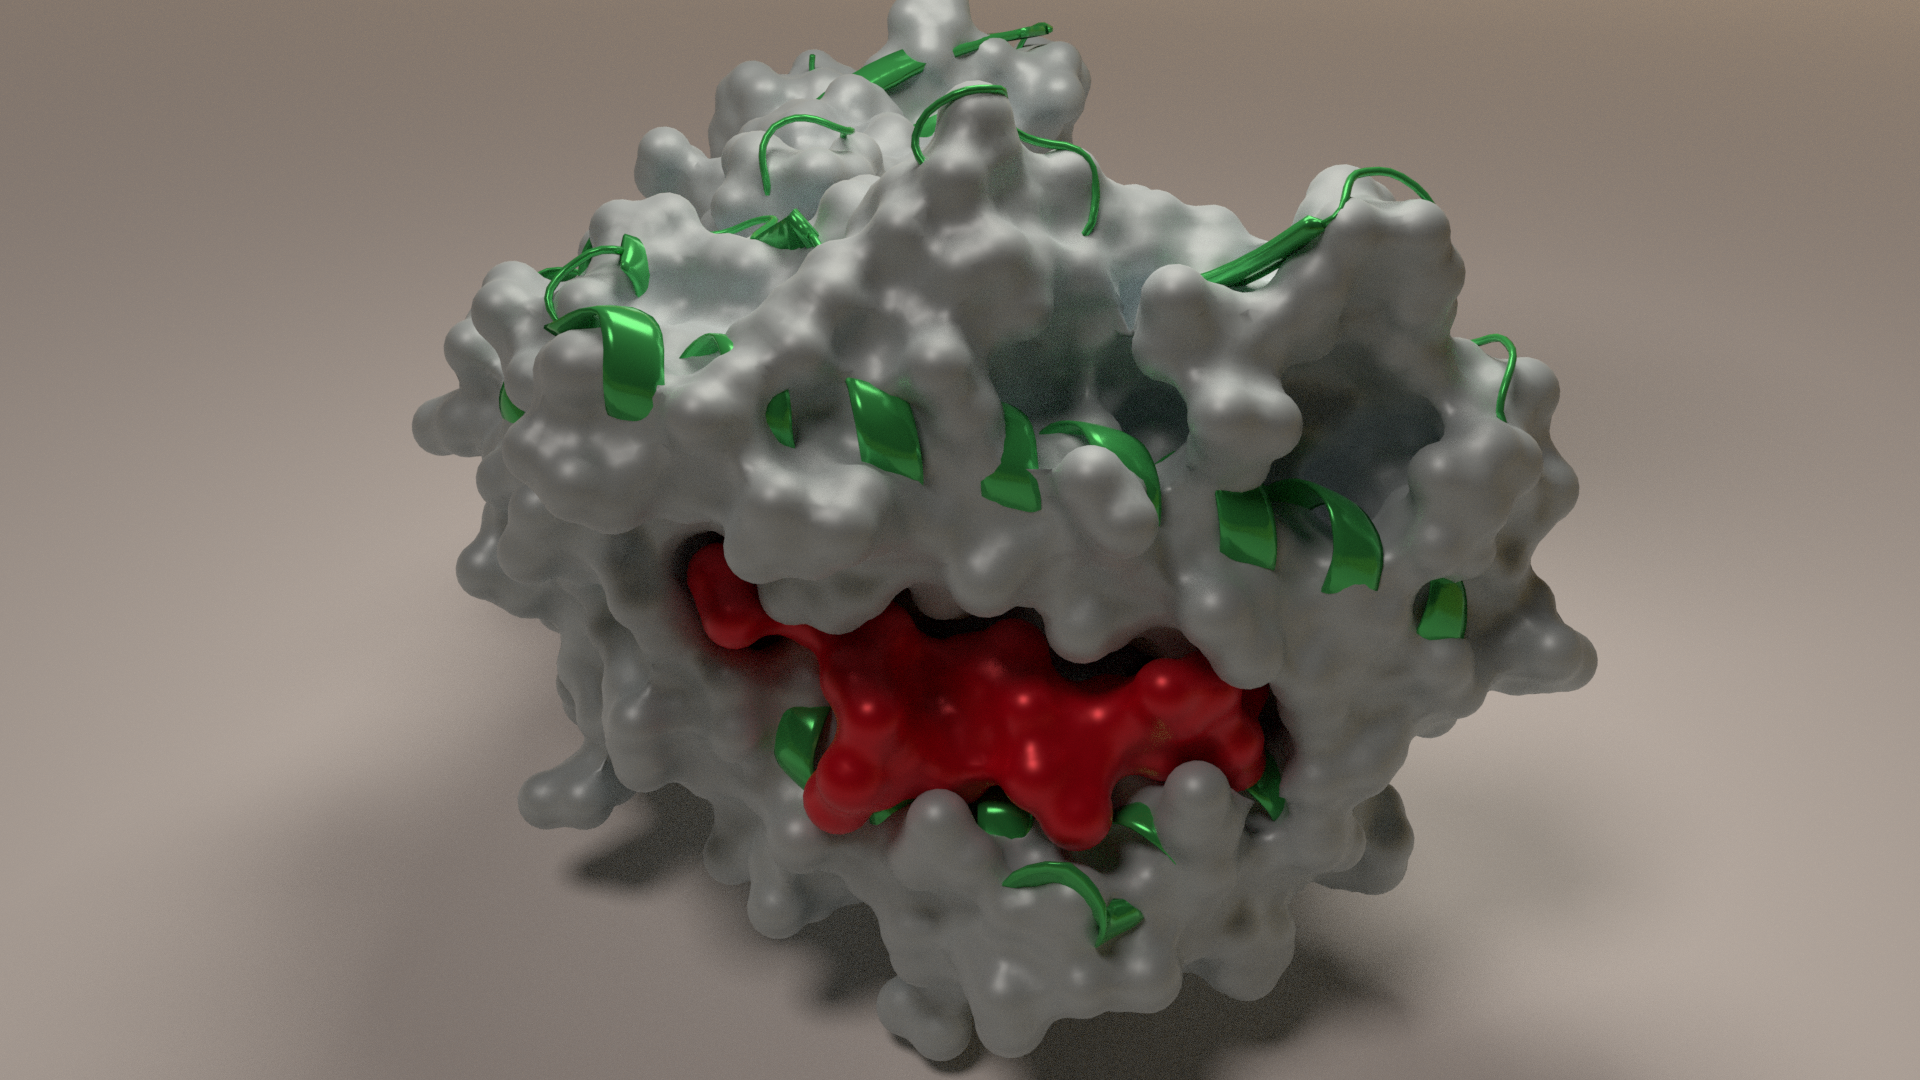
This model is a surface style representation showing how the peptide fits inside the groove.
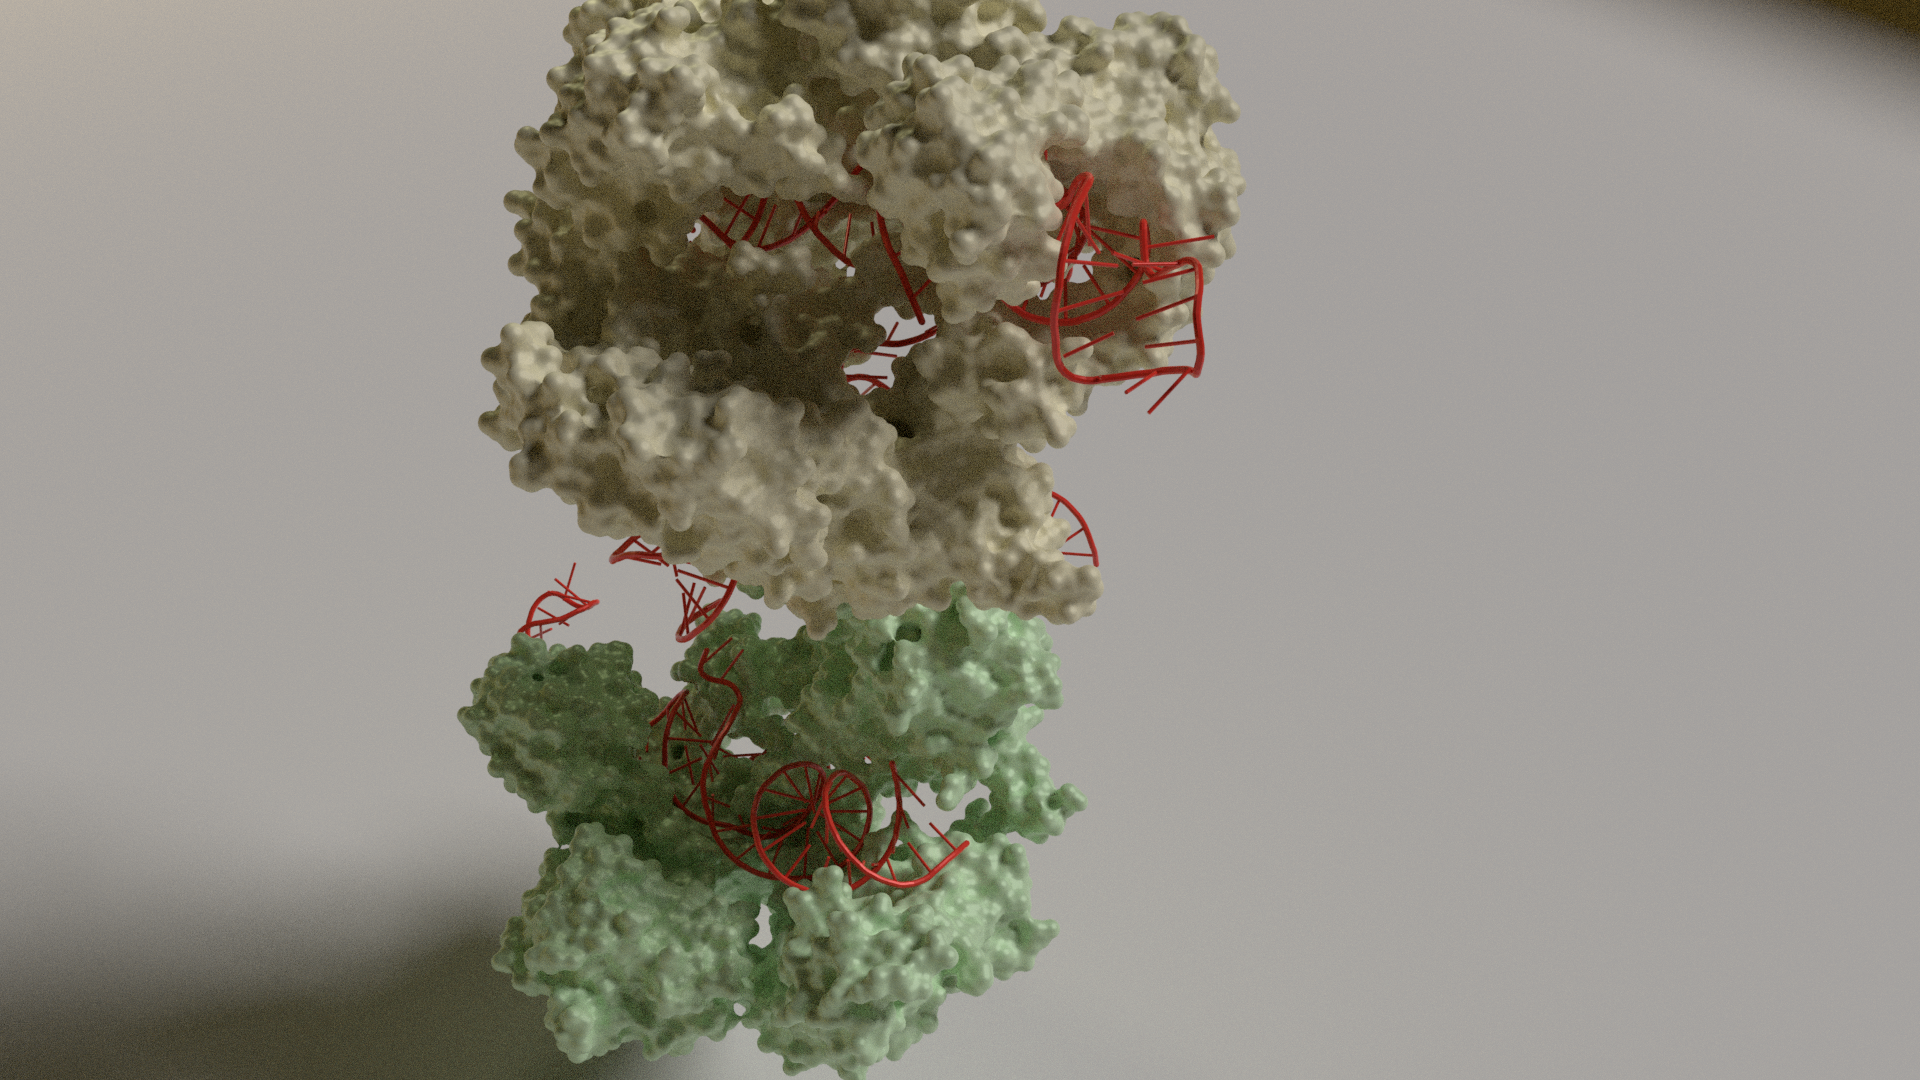
CRISPR-CAS RNA complex
Cas proteins fight viruses in bacteria. The Cascade complex carries an RNA transcript of the CRISPR sequence and searches through the cell for matching viral DNA from an infection (CRISPR DNA). If it finds viral DNA, it unwinds it and mobilizes nucleases to cut it up. The complex is composed of different types of proteins shown below along with the RNA transcript in red.
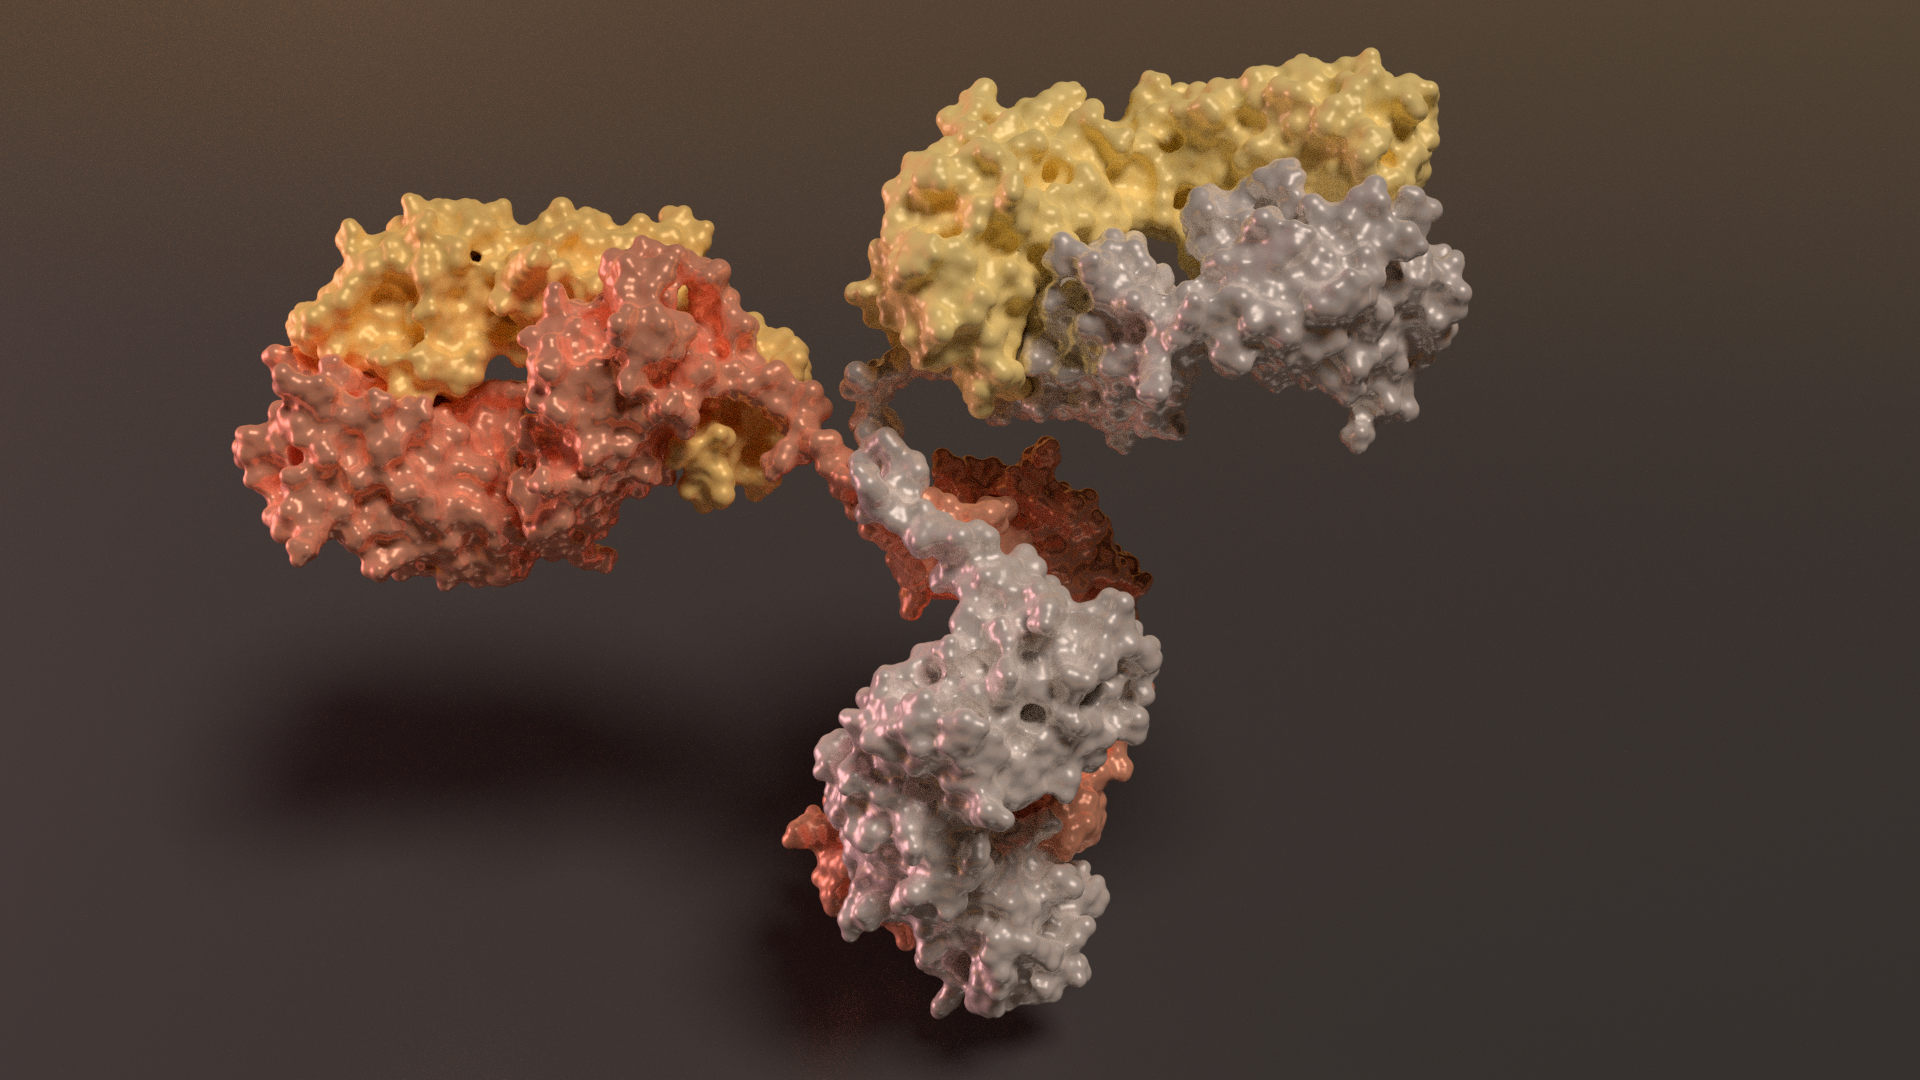
Antibody
Antibodies circulate in the blood. Each type binds to a different target molecule not present in your own tissue. When they find a target molecule they bind tightly to its surface and then mark it for destruction. They are composed of several flexible arms with binding sites at the end of each one. The flexible arms allow the binding sites to work together. Thin, flexible chains that connect these arms to the central domain at the bottom.
Animations
It’s also possible to animate scenes in Blender. Again, the full details are beyond the scope of this article. The video below shows simple animated versions of the models above. These were made by simply making the virtual camera move around the models in a circular path. Each frame is rendered to an image and these are compiled into a video using ffmpeg. This can be a time consuming process though. It could take several hours just to render half a minute of video. There is a new version of Blender (2.80) which has some improved features including a real-time renderer called Eeevee. You may want to try this instead. You can imagine that much more advanced uses of animation to illustrate molecular processes are possible. There is almost no limit with Blender - with enough expertise..